Mastering Needle Depth in Microblading: The Secret to Perfect Results
Understanding Skin Anatomy
The three essential layers
The skin is made up of three distinct layers, each with a specific role in holding pigment:
The epidermis (0.05 to 0.1 mm thick)
- Surface layer in constant renewal
- Lifespan: 28 days
- Common mistake: Pigmenting too superficially in this area
The papillary dermis (0.1 to 0.3 mm deep)
- Ideal area for micropigmentation
- Moderate vascularization
- Slow cell renewal
- Goal: Reach this layer for optimal hold
The reticular dermis (beyond 0.3 mm)
- Risk of scarring
- Pigment diffusion ("blow-out" effect)
- To be avoided absolutely
Variations according to the areas of the face
The depth of penetration varies depending on the location:
- Eyebrows: 0.12 to 0.15 mm (thicker skin)
- Eyelids: 0.08 to 0.10 mm (very thin skin)
- Lips: 0.10 to 0.12 mm (delicate mucosa)
Chems tools for millimeter precision
PhiBrows Needle Selection
For beginners:
- Tool U18 : 0.18 mm needle, perfect for learning
- Easy depth control
- Reduced margin of error
For experts:
- Tool U16 : 0.16 mm needle, maximum precision
- Finer, more natural features
- Requires perfect mastery
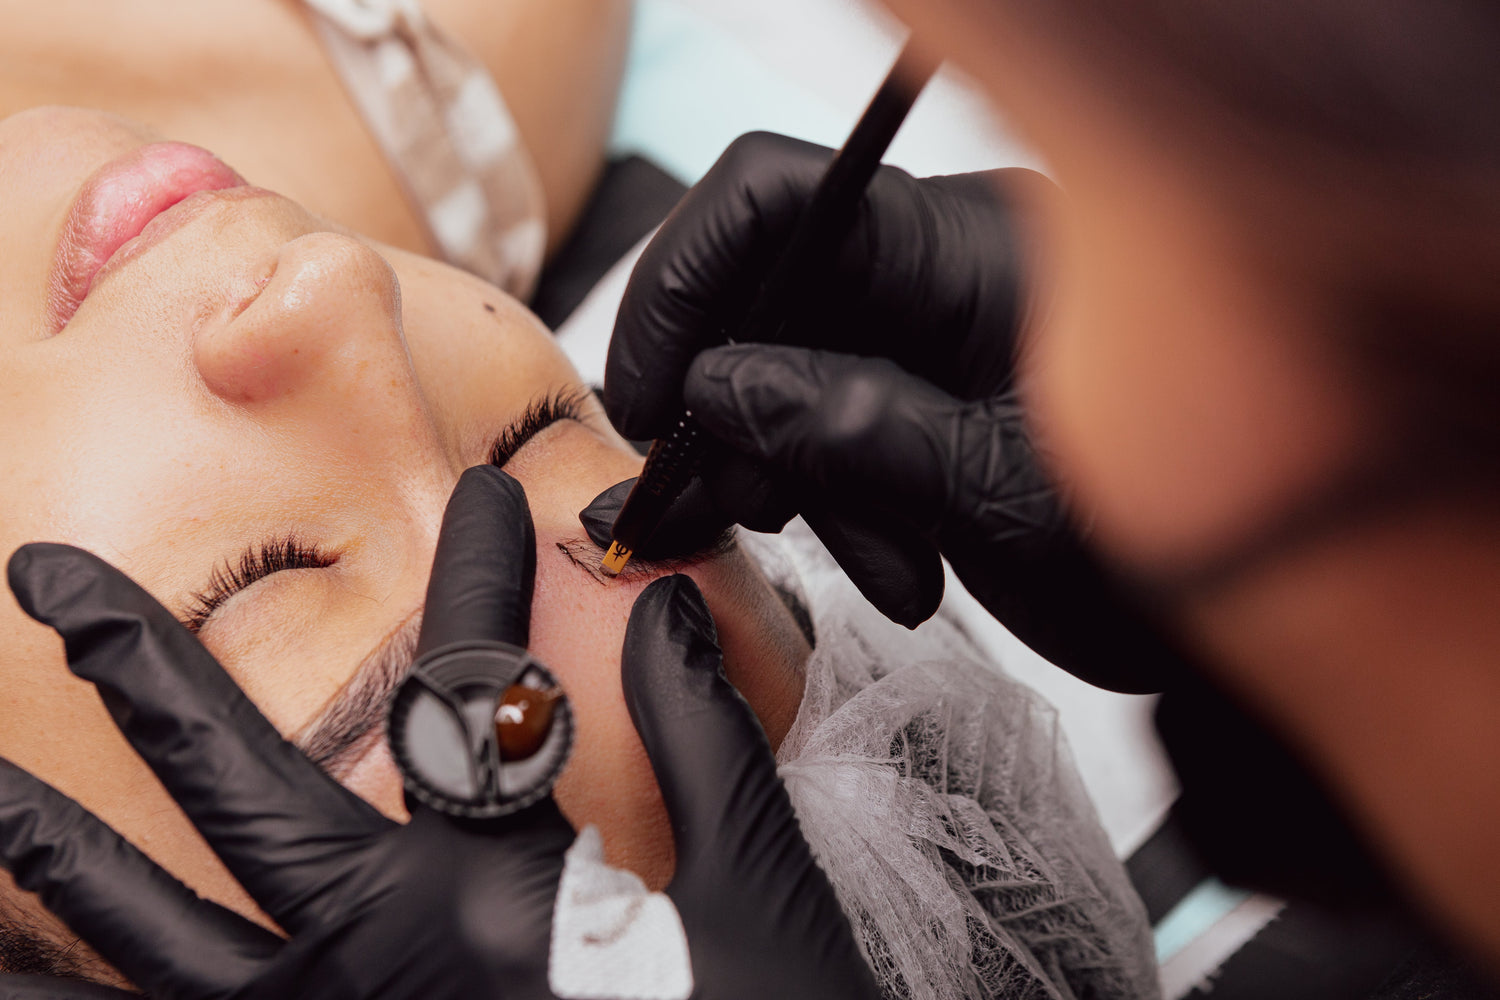
Gripping technique
Optimal angle of attack:
- 45° for beginners : Easy control
- 30° for experts : Increased precision, finer lines
Pressure exerted:
- Light touch : The needle should "caress" the skin
- Resistance test : If the skin deforms, excessive pressure
- Tactile sensation : Light "click" with each stroke
Depth Test Protocol
Step 1: Test Area
Always start with an inconspicuous test area:
- Location : Tail of the eyebrow (less visible)
- Length : 2-3 mm maximum
- Objective : Validate the depth before the service
Step 2: Immediate Observation
Visual indicators:
- Too superficial : Pigment visible on the surface, "laid" appearance
- Correct depth : Embedded pigment, natural appearance
- Too deep : Bleeding, excessive inflammation
Skin reaction:
- Normal : Mild warming, moderate redness
- Alert : Heavy bleeding, severe pain
Step 3: Technical adjustment
If too superficial:
- Slightly increase the angle of attack
- Check the needle sharpness
- Adjust the pressure
If too deep:
- Reduce the pressure
- Decrease the angle of attack
- Slow down the movement
Factors influencing depth
Client's skin type
Mature skin (45+ years):
- Thinner epidermis
- Reduce depth by 10-15%
- Pay attention to wrinkled areas
Young skin (18-30 years old):
- Thicker epidermis
- Fast healing
- Applicable standard depth
Oily skin:
- Enlarged pores
- Risk of pigment diffusion
- More superficial technique recommended
Environmental conditions
Ambient humidity:
- Dry air : Skin less supple, adjust pressure
- High humidity : More elastic skin, enhanced control
Cabinet temperature:
- Ideal : 22-24°C for optimal comfort
- Too hot : Dilated pores, increased bleeding
Common Mistakes and Solutions
The "Blow-out" of the pigment
Cause: Penetration too deep into the reticular dermis
Signs:
- Thick and blurred lines
- Grayish color after healing
- Imprecise contours
Prevention:
- Continuing education on anatomy
- Using Calibrated Chems Tools
- Practice on synthetic skin
Premature pigment loss
Cause: Implantation too superficial
Signs:
- Fast fading (2-3 weeks)
- Excessive flaking
- Uneven result
Solution :
- Retouching with adjusted depth
- Additional technical training
Maintenance and upkeep of tools
Needle quality control
Visual inspection:
- Checking the sharpness
- Absence of deformation
- Perfect cleanliness
Penetration Test:
- Test on synthetic skin
- Validation of fluency
- Accuracy control
Equipment renewal
Recommended frequency:
- Needles : Single use only
- Sleeves : Cleaning after each client
- Measuring compass : Systematic sterilization
Continuing Education at Chems
Technical masterclass
Our specialized training covers:
- In-depth anatomy of the skin
- Advanced Penetration Techniques
- Practical cases on models
- Skills certification
Personalized follow-up
- Video analysis of your technique
- Personalized improvement advice
- Update of protocols
- Unlimited technical support
Conclusion
Mastering needle depth in microblading is achieved through practice, training, and the use of quality tools. At Chems, we put our expertise to work for your artistic development.
Excellence is not an accident, it is the result of perfectly mastered technique.
Share
